
1. Why shade sails?

1.1 The rise of shade sails in modern outdoor design
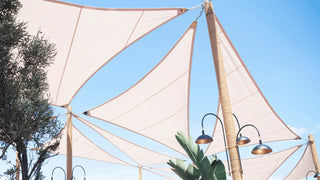
Shade sails are a smart and affordable solution for anyone looking to improve their outdoor space. These sails offer excellent sun protection, add visual appeal, and can transform any backyard, patio, or garden into a more usable and stylish area.
With a variety of designs such as triangle, rectangle, or square you can choose a sail design that complements your layout and perimeter. Ideal for both DIY projects and professional home improvement, shade sails provide weather relief and elevate the value of your property. From patios to decks to garden corners, they fit in nearly every location.
1.2 Common mistakes homeowners make during installation
A successful shade sail installation depends on choosing proper mounting points and tightly secured connections. Homeowners often skip essential steps like checking the structural stability of a wall or fascia before attaching mounting hardware. Another common error is using inadequate hardware, such as plastic anchors instead of stainless steel eye bolts or pad eyes.
Improper slope design can lead to water pooling in the middle of the sail, while insufficient tensioning causes sagging. It’s also vital to use the correct wire rope, strap tensioners, or steel wire when connecting the sail to each anchor point.
2. Step-by-step shade sail installation
2.1 Planning: Site, shape, and sun
2.1.1 Choosing the right spot
To determine the best location for your sail, measure your outdoor space carefully and mark each mounting point. Use a level to ensure proper alignment and check for existing structures like trees, gutters, or windows that might obstruct your project.
It's also important to identify areas that receive consistent sun to provide adequate sun shade and coverage. Consider the direction of the sun and prevailing wind to avoid unnecessary tension on your structure. Using an online sun path calculator can help with planning.
2.1.2 Selecting shape and size
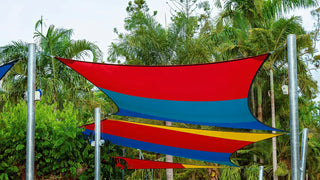
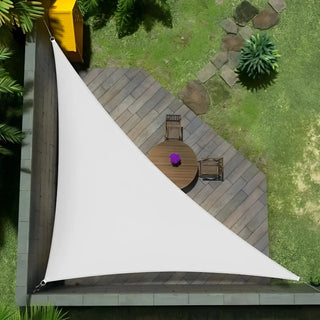
Choosing the right size and shape is essential to a successful installation. A triangle shade sail works well for small areas or design accents, while a rectangle shade sail offers broader coverage. You can mix shapes for a more creative idea and design effect.
Be sure to leave room for hardware like turnbuckles and rope, which require a bit of clearance beyond the actual fabric dimensions. Use a garden hose or string to trace the perimeter and visualize the sail design before committing to fixing points.
2.2 Choosing mounting points and anchors
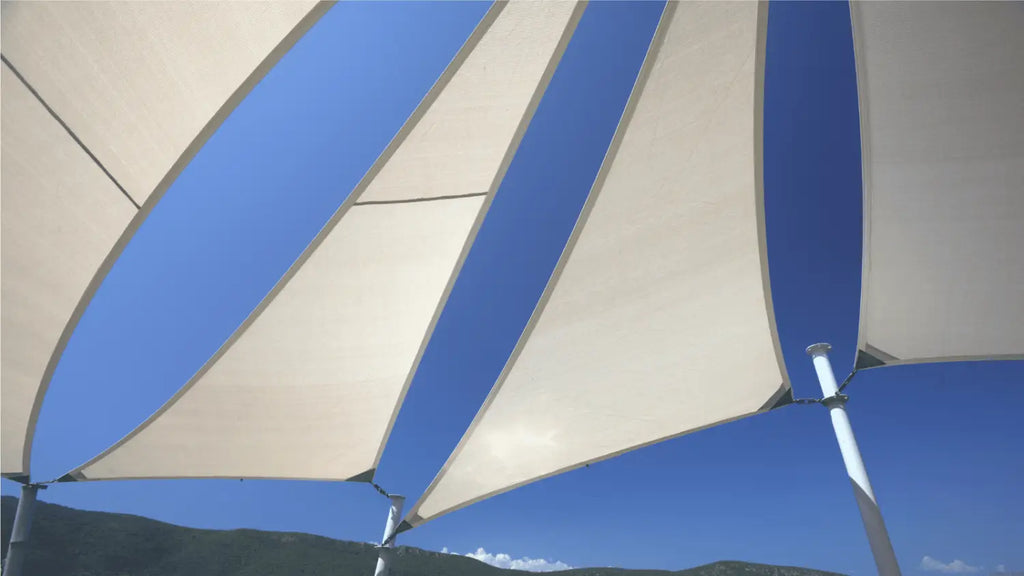
2.2.1 Wall vs. pole installation
Mounting points can include walls, fascia boards, trees, and steel or wooden posts. Ensure your house walls or fascia are structurally sound before drilling into them. Use eye bolts and screw eyes that are rated for heavy tension, especially near windows or under eaves.
When setting posts, dig a post hole at least 2 feet deep, add gravel at the base of the post, then fill it with quick-setting concrete mix for added stability. Angle the post away from the center of the sail to create strong support under tension.
2.2.2 Anchoring safely in different materials
Different surfaces require different anchor solutions. For wood, use lag bolts or eye hooks; for brick or concrete, use expanding bolts. Avoid directly attaching to vinyl siding use studs or fascia support for better structural strength.
Use stainless steel mounting hardware to prevent rust and corrosion over time. Always connect hardware toward the middle of the sail to distribute tension evenly. A screw eye and wire rope combination with turnbuckles works well for most installations.
2.3 Gathering the right hardware and tools
Before installing your shade, gather the full installation kit. This includes pad eyes, D-shackles, wire rope, turnbuckles, eye bolts, screw eyes, and any connection accessories like strap tensioners. A basic tool set should include a drill, level, wrench, tape measure, and socket set.
Don’t forget to wear safety gear like gloves and goggles, especially when working with stainless steel components or power tools. Check all items beforehand to ensure a smooth and uninterrupted installation process.
2.4 Installing anchor points
Mark each anchor point using chalk or a pencil and measure again to ensure spacing is correct. Drill into the wall or support post, depending on your setup. For deck or patio installations, attach pad eyes to structural beams. Insert your fixing hardware and tighten bolts or screws fully to ensure stability.
If you're attaching to a tree, wrap a wire rope or heavy-duty strap around the trunk, above eye level, and ensure the connection is secure. Let any concrete footings cure for at least 24 hours before mounting.
2.5 Hanging and tensioning the shade sail
Begin by attaching the corners of the shade sail to each anchor point using D-shackles or turnbuckles. Connect the wire rope or rope to allow flexibility. Adjust the tension by tightening the turnbuckles little by little in a step-by-step process.
The fabric should be taut but not overly stretched. Proper tensioning prevents sagging and allows water to run off the sail easily. Check all hardware and make sure every connection is tightly secured. If you're unsure about any part of the process, consult a simple tutorial video online.
3. Customizing and enhancing your installation

3.1 Lighting and accessories
Add light fixtures like solar string lights or LED bulbs to create ambiance under your sail. Clip lights along each corner of the sail using wire clips or hooks. Consider privacy solutions like mesh curtains or attachable screens to make the space feel more enclosed.
Mount speakers or small planters for extra style. When choosing accessories, make sure they are lightweight and won’t compromise the stability or fabric tension of your canopy.
3.2 Seasonal adjustments & maintenance
Perform regular cleaning of your shade fabric to prevent buildup of dirt and mildew. Use mild soap, water, and a garden hose avoid high-pressure machines. During harsh weather or winter months, detach the sail and store it in a dry place.
Inspect the mounting hardware for rust or loosening. Re-tension each connection using turnbuckles as needed. Proper care extends the life of your sail and maintains both performance and appearance.
4. Radically new tips & pro install secrets

4.1 Shade sail + smart tech integration
Modernize your patio shade with home automation. Connect smart lights that operate based on time or voice command. Add a wind sensor that automatically loosens your wire tension to protect the sail in bad weather. These ideas provide sun protection and peace of mind in one streamlined system. Smart solutions also help with energy savings and daily convenience.
4.2 Bio-inspired anchoring techniques
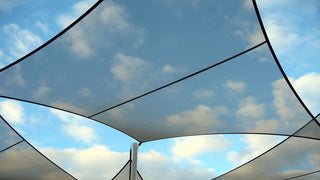
Nature offers clever ways to distribute weight and resist pressure. Mimic spiderweb layouts for the placement of your wire rope and anchor points. Use a geodesic triangle structure or mounting square to improve load distribution.
These bio-inspired fixes can offer increased stability and are particularly helpful in large sail setups or multi-sail installations. Add this to your DIY toolkit for advanced builds.
4.3 Urban-friendly solutions: Installing without posts
Not every outdoor space allows for digging or permanent changes. For renters or urban dwellers, use heavy planters with concrete bases as mobile anchor points. Mount to structural parts of your building like fascia, brick walls, or sturdy corners.
Use adjustable hardware kits to install and remove your sail seasonally. Consider a retractable canopy or removable fabric for flexibility and ease.
4.4 Low-budget, high-impact installation hacks
Recycling and upcycling are perfect for quick, low-cost setups. Reuse trampoline frames or clothesline poles as structural elements. A garden hose can outline the sail perimeter before you dig any hole.
Use rope and carabiners for quick setup, and create mounting points with a simple eye hook and bolt. These tips are great for temporary setups and can even offer full protection in fair weather.
5. Conclusion: Your space, your shade, your way
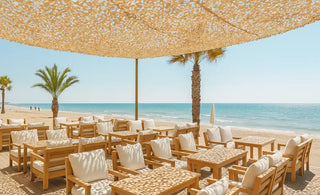
Installing a shade sail is a rewarding DIY project that adds style, comfort, and sun protection to any outdoor space. With the right plan, quality materials, and a clear step-by-step guide, you can create a stunning canopy setup that will last for years. From patios and decks to gardens and balconies, there’s a sail solution for every situation.
Don’t forget to read our privacy policy for service terms and create an account to access exclusive installation kits, bonus content, and support links. For best results, follow every instruction carefully, tighten all bolts, and enjoy your new shaded retreat!