Sunny Garden Market proudly offers the most advanced desert camo netting available for anyone demanding authentic sunshade camouflage netting quality for their outdoor, camping, or survival projects.
Our nets are engineered with premium 420D fabric, making them twice as strong as standard netting solutions and highly resistant to tearing, mold, and intense sun exposure.
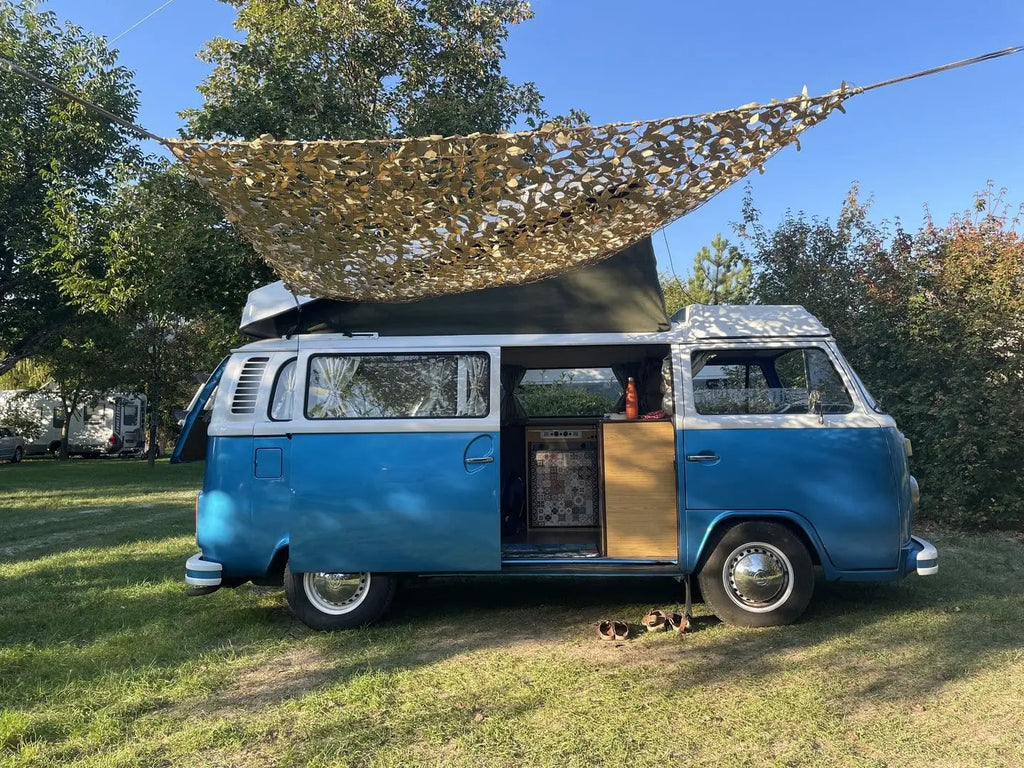
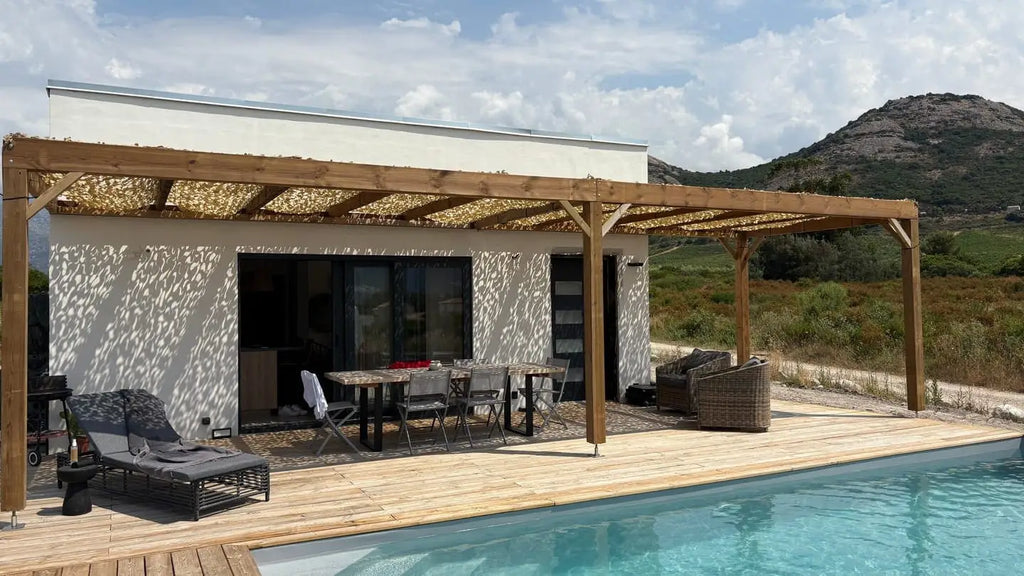
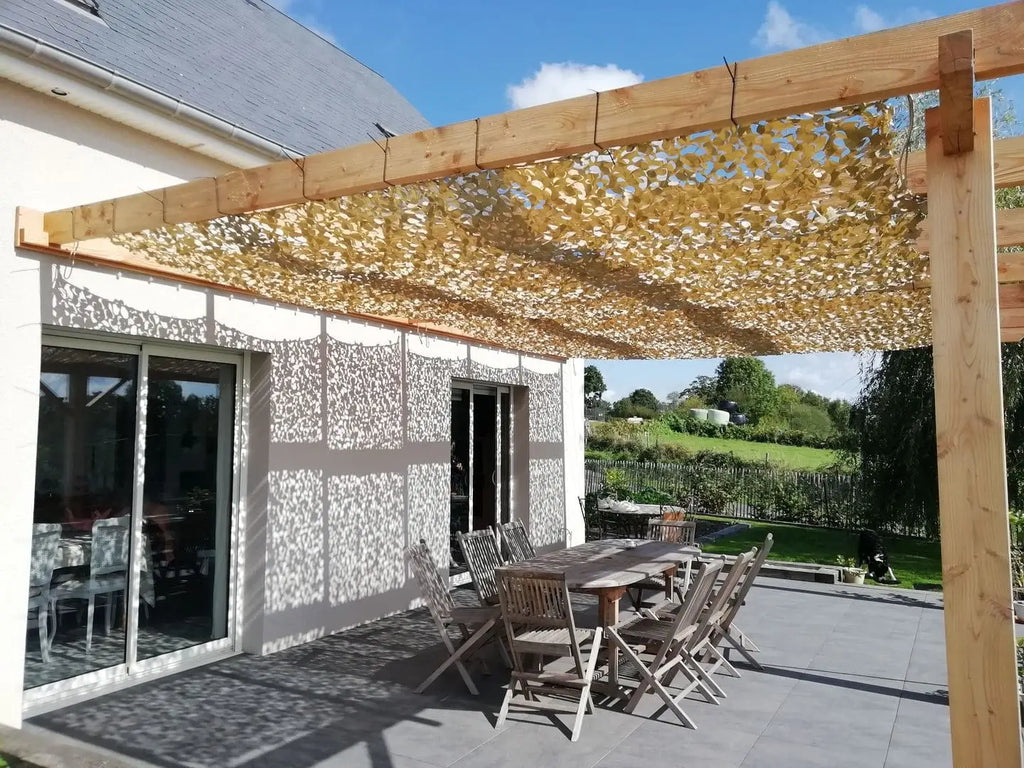
Whether you’re preparing for building a hide, shading your gear, or adding a unique touch to a film set or business installation, our desert camo netting delivers superior concealment, protection, and durability.
At Sunny Garden Market, we understand that each project is unique, so we offer a vast range of sizes, types, and custom options. Our selection includes single-layer, double-layer, and reinforced nets suitable for civilian applications.
For those who demand lightweight portability, our ultra lite nets are ideal, while fire-retardant and waterproof variants provide added safety and reliability in challenging environments. All nets feature robust loops and rugged mesh structures, providing easy installation and versatile use for concealment and shade.
Product details of our desert camo netting
-
Twice as strong as competing brands thanks to our 420D durable fabric, ensuring longer life and fewer replacements.
-
Available in authentic desert camouflage patterns, including digital and natural color desert styles to blend seamlessly into any arid environment.
-
Options for black, white, and desert shades for diverse camouflage needs.
-
Lightweight yet strong, making setup and takedown fast and easy for any outdoor activity.
-
UV resistant, mold resistant, and crafted to withstand harsh conditions.
-
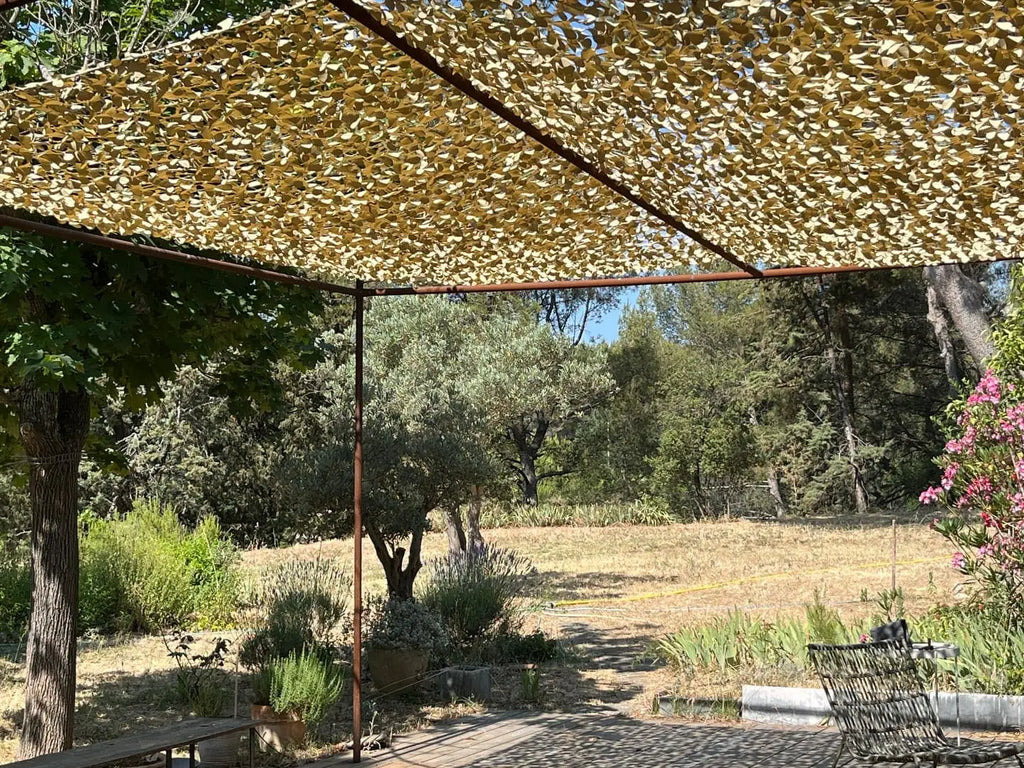
Perfect for creating shade, privacy, or concealment over equipment, vehicles, or structures.
-
Supplied in various sizes, from small pieces to bulk rolls, so you can select the exact coverage for your project.
-
Compatible with all standard gear and accessories for tactical, decorative, or commercial use.
Available sizes and options
Sunny Garden Market’s desert camo netting comes in a huge variety of sizes and patterns to match your exact requirements. We offer:
-
Pre-cut nets in standard dimensions such as 2×2 meters up to expansive 10×10 meters, suitable for covering vehicles, shelters, or creating large shade areas.
-
Custom-cut lengths off the roll to fit unique installations for commercial sets or specialized outdoor spaces.
-
Digital desert camo netting for enhanced concealment in high-tech surveillance environments.
Whether you’re looking to buy for a personal survival kit, a commercial business project, or government supply, our store ensures every customer finds precisely what they need.
Versatile applications
Our desert camo netting is trusted by armed forces, hunters, and creative professionals alike. It’s perfect for:
-
Building durable hunting blinds and hides for discreet wildlife observation.
-
Creating stylish yet practical shade structures in desert resorts or festivals.
-
Adding a dramatic touch to film sets, theme parties, or decorative outdoor spaces.
-
Providing privacy and protection for campsites, yards, or temporary installations.
-
Enhancing survival gear setups with reliable, lightweight, and durable covering solutions.
Because our nets are available in bulk, they’re perfect for large-scale projects where cost efficiency and consistent quality are crucial.
Shop with confidence at Sunny Garden Market
When you shop Sunny Garden Market, you’re choosing a brand known for excellence and innovation. We provide:
-
Secure online ordering with convenient payment options for both retail and business customers.
-
Fast shipping and dependable delivery across the world, ensuring your nets arrive when you need them.
-
Hassle-free returns policy to guarantee your satisfaction.
-
Competitive prices, frequent deals, and a vast selection so you can compare and select the right product for your project.
-
Exceptional customer service from experts who understand camo netting and can advise you on the best options for any application.
With every product, you’ll enjoy a perfect blend of performance, durability, and aesthetic appeal. We believe that true quality means being independently tested and suitable for any demanding environment.
Explore our desert camo netting selection
View our full range online and experience why Sunny Garden Market leads the industry in desert camo netting solutions:
-
High-quality mesh construction for both light and heavy-duty uses.
-
A balance of lightweight feel and strong, durable build to suit every environment.
-
All nets are designed to be easy to handle, safe, and suitable for diverse applications, from camping trips to large-scale army deployments.
Sunny Garden Market ensures you’re always covered, no matter your mission. Our desert camo nets are the perfect solution to create the ultimate concealment, shade, or privacy wherever you operate.
Explore our store, view our products, and let us supply you with the industry’s best desert camo netting solutions today.
Buy now for your next project
Don’t wait, add to cart, enjoy our fast shipping, and discover the difference that genuine Sunny Garden Market quality makes. Whether you’re working on a hunting or creative project, we’re here to help you create the perfect result with our unbeatable desert camo netting.
Explore our online store today and experience the best value, highest quality, and widest selection in the market!


 Heavy-duty fabric designed to withstand outdoor conditions