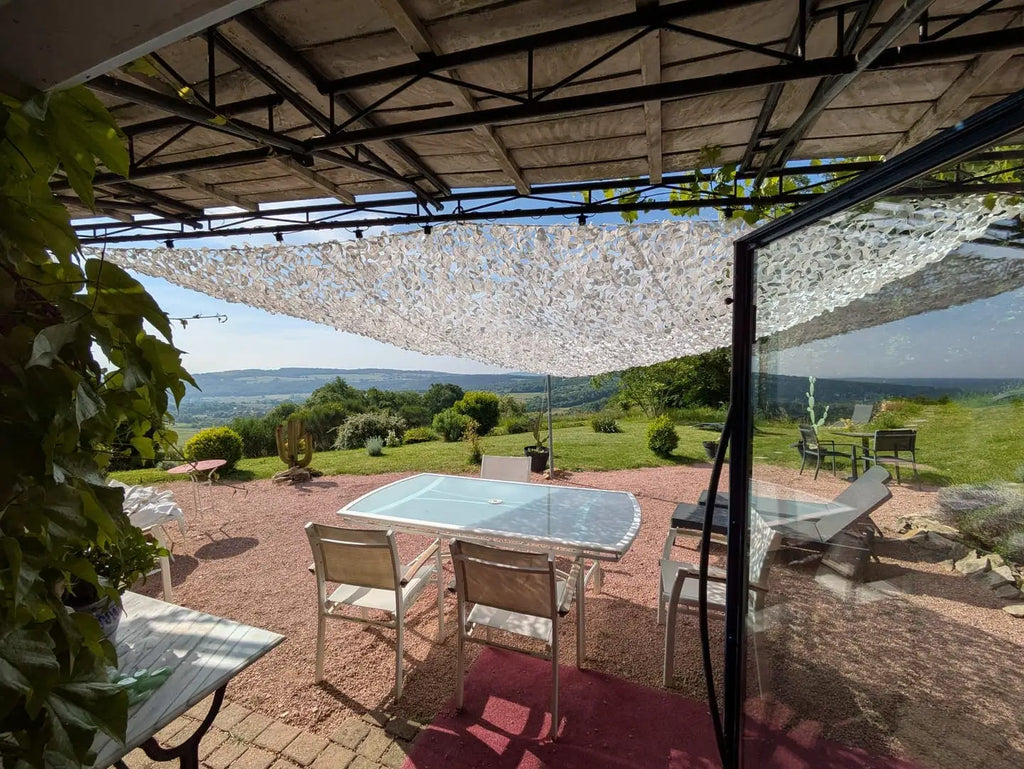
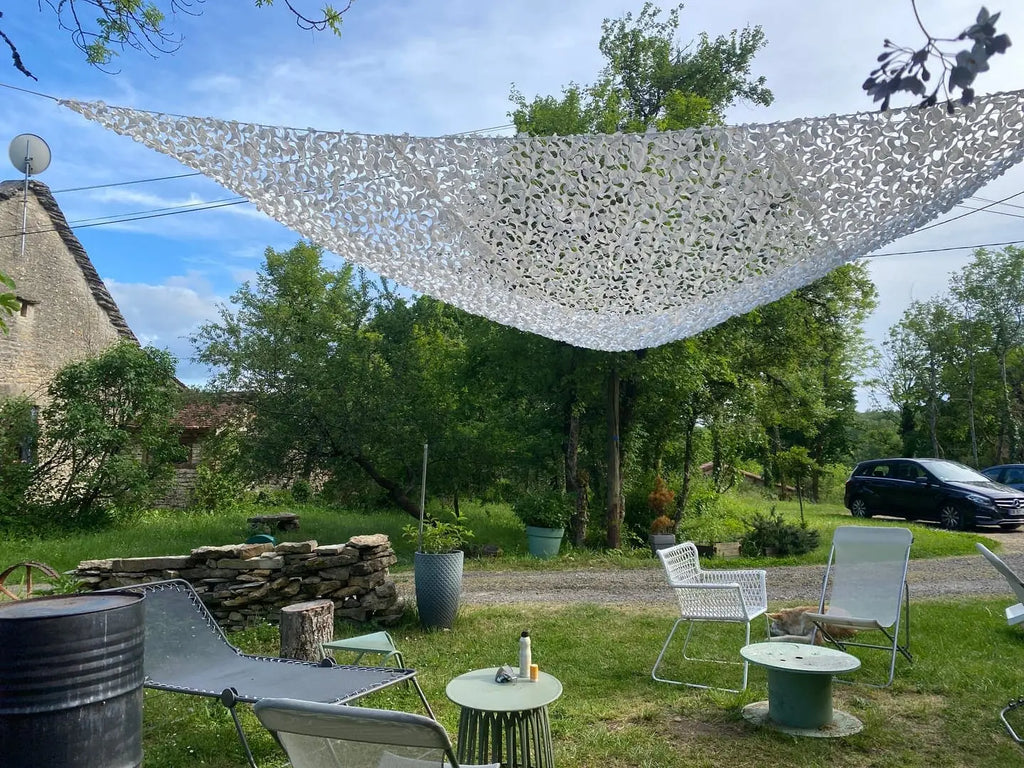
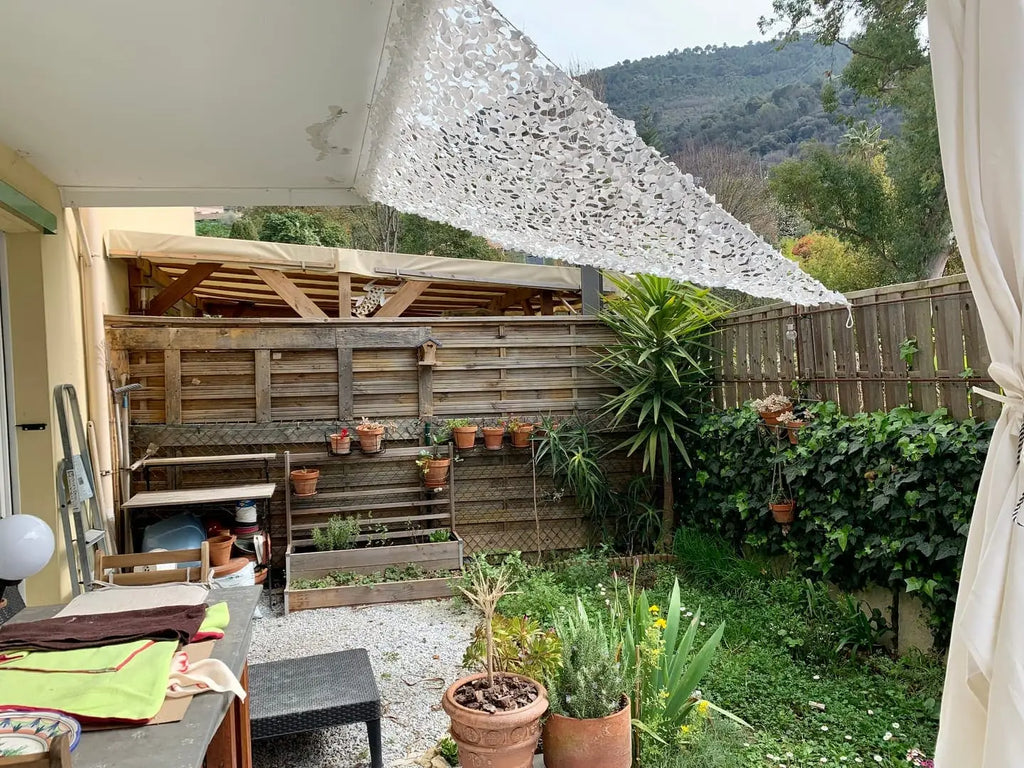
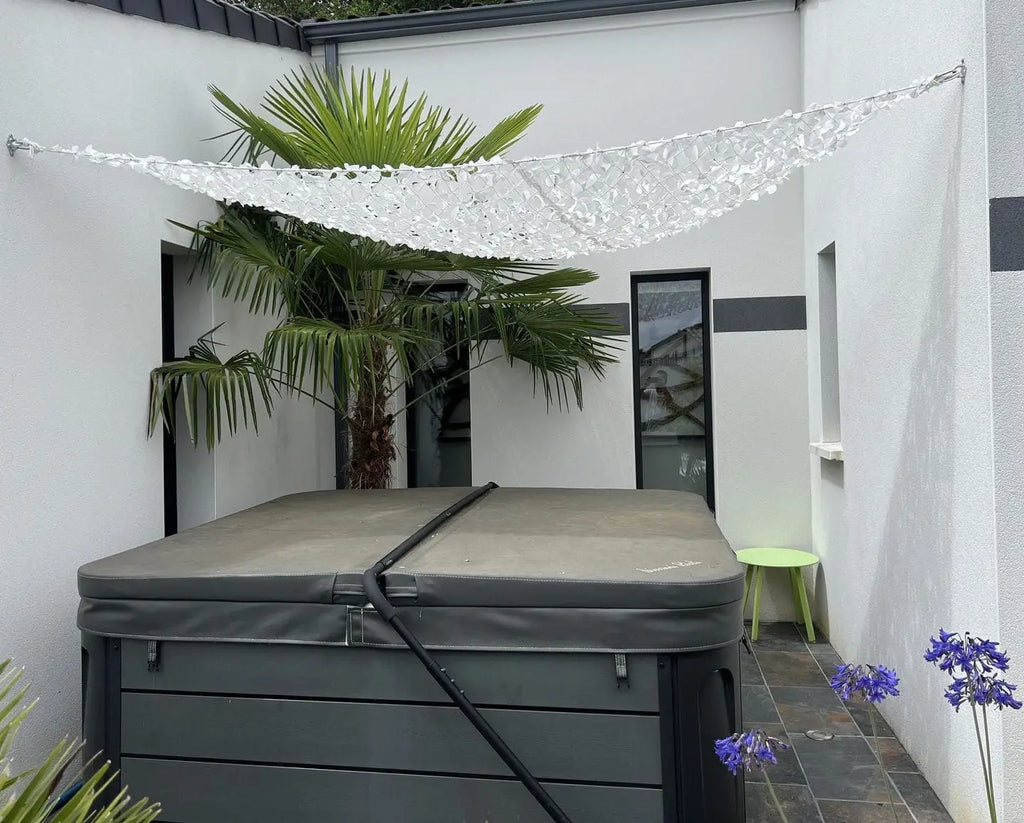
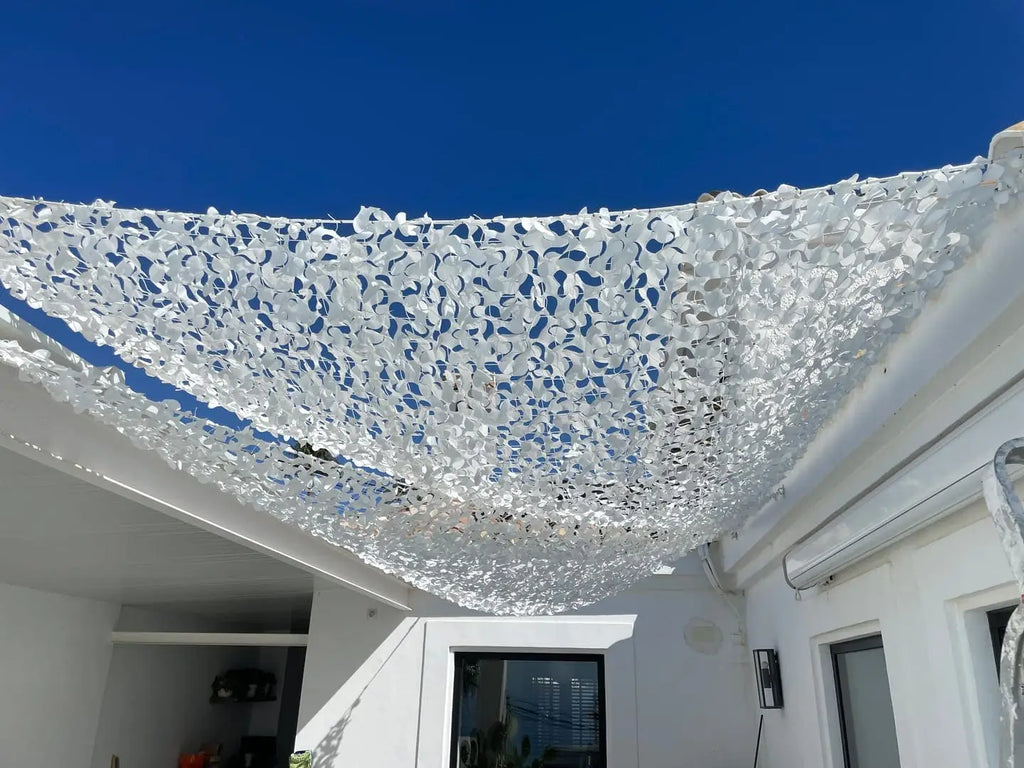
Camo Netting | White
- Unit price
- / per
- Built to last: withstands wind and humidity
- Cool and shaded: blocks 80% of sunlight
- Military-style S-cut design
- Made from premium 100% polyester
- Hassle-free setup: 40 cm loop fastenings on all four corners
- 1 x camo netting of chosen dimension
White camo netting – stylish, versatile, and built to last
Looking for a unique way to enhance your outdoor space? Our white camo netting is more than just a functional shade—it’s a modern and stylish accessory that transforms any setting. Whether you're creating a chic, shaded retreat on your terrace, adding a trendy decorative touch indoors, or setting up privacy protection for an event, this netting is the perfect solution. Lightweight yet durable, it provides excellent sun protection while maintaining an airy, elegant look.
A modern decorative touch
Unlike traditional camouflage netting, the crisp white design adds a bright, contemporary feel to any space. Use it indoors as a curtain or window covering to diffuse light while maintaining privacy, or outdoors to create a stylish canopy over a pergola, terrace, or balcony. Its sleek, minimalistic appearance also makes it a popular choice for event decor, from garden parties to weddings.
Reliable UV and heat protection
This reinforced camo net offers 70-80% shade, making it an excellent choice for blocking harsh sunlight while still allowing a gentle breeze to pass through. Thanks to its UV-resistant fabric, it maintains its bright white color over time without fading. Plus, its heat-reflecting properties keep your space cooler, making it ideal for sunny outdoor setups.
Durable and weather-resistant
Built for both aesthetics and endurance, this camo net is made from tear-resistant polyester, ensuring it withstands various weather conditions, including strong winds. Whether you're setting it up for a long-term shade solution in your backyard or using it for temporary shelter at an outdoor event, this netting is designed to last.
Easy to install and adapt
Installation is hassle-free—secure it with zip ties, ropes, or built-in attachment loops for a snug fit. Its lightweight yet sturdy construction makes it versatile for a range of uses, from creating shade at a campsite to acting as a privacy screen for a patio or event booth. For a dramatic effect, pair it with lighting for a stunning ambiance at night.
Perfect for creative and professional use
More than just a shade solution, white camo netting is also a go-to accessory for photographers, filmmakers, and event planners. Use it as a backdrop for photoshoots, an eye-catching festival tent cover, or even as part of a themed paintball or laser tag setup. Its neutral yet striking color makes it adaptable for countless applications.
Whether you're seeking shade, privacy, or a stylish decorative element, this reinforced white camo net is a practical and aesthetic choice that fits seamlessly into any environment.
Looking for a different color?
We have additional 7 more colors available in our Camo Netting collection.
- Free tracked shipping: Enjoy fast, free delivery with tracking to monitor your order from dispatch to arrival.
- Easy returns: If you're not satisfied, return your item within 14 days for a full refund.
Camo Netting | White
- Unit price
- / per

How to install a shade sail: A step-by-step guide
1. Why install a shade sail?
Creating a shaded outdoor space is an affordable way to add comfort and protection to your backyard. A shade sail provides a stylish alternative to an umbrella, keeping your deck or patio cool while blocking harmful UV rays.
With the right planning, materials, and fixing accessories, installing a shade sail is an easy DIY project that enhances both aesthetics and functionality. Proper installation ensures that the sail remains durable and secure, providing long-term privacy and sun protection.
2. Choosing a shade sail
Shape and size
Shade sails come in various shapes, including triangles, squares, and rectangles. A triangle shade sail is ideal for creating a modern, open look, while a square or rectangular sail provides more shade coverage.
When selecting a size, ensure you measure your space accurately and leave room for tensioning adjustments to maintain a secure and taut sail.

Fabric options
The type of fabric you choose depends on your needs.
Breathable fabric allows for airflow, keeping the area cooler while still providing shade. Waterproof materials, on the other hand, offer rain protection and are ideal for areas where you want to stay dry.
Both options come with UV protection to help block harmful rays and increase the durability of the sail.
Color

The color of your shade sail plays a significant role in both aesthetics and functionality.
Lighter colors such as beige, white, or light gray reflect more sunlight, keeping the shaded area cooler and making them ideal for hot climates.
Darker colors like navy, charcoal, or deep green provide better UV protection and create a cozy, more enclosed feel, which is useful for privacy.
Bold colors like red or yellow can add a vibrant focal point to your outdoor space, while neutral tones blend seamlessly with natural surroundings.
When selecting a color, consider how it complements your home, garden, or deck, and whether you want it to stand out or harmonize with existing elements.
UV protection
A high-quality shade sail will provide excellent UV protection, reducing the amount of sun exposure in your outdoor space. Look for sails with reinforced edges and durable materials that can withstand changing weather conditions.
3. Planning your shade sail installation
Installation types: wall, poles, and combinations
Wall-mounted installation
A wall-mounted installation is ideal when you have a sturdy structure such as a house, garage, or reinforced fence. Brackets or eye bolts are attached to the wall, providing strong anchor points for the sail. This type of installation is great for smaller areas like patios and courtyards, offering a clean and minimalist look. However, the wall must be structurally sound, and the connections must be reinforced to withstand wind and tension.
Pole-mounted installation
Installing shade sails using poles allows for flexible placement and customization. Steel posts or wooden posts can be positioned anywhere in your garden, backyard, or patio to create the desired shade coverage. The posts must be installed deep in concrete foundations to ensure they remain stable. This type of installation is particularly useful for larger areas where a wall or roof mounting option is unavailable.
Combination of wall and poles
A combination of wall and pole installations provides maximum flexibility. One side of the sail can be mounted to a wall, while the other is attached to a pole, allowing for creative shading angles. This method is often used in patios, decks, and gardens, where a fixed structure provides part of the support, reducing the number of required poles. This approach is both cost-effective and visually appealing.
Layering and combining multiple sails

For a more dynamic and aesthetically pleasing outdoor space, consider layering multiple sails or using different sail sizes. Combining triangle and square sails at varying heights can create a unique canopy effect, enhancing the overall design. Overlapping sails provide additional shade and improve privacy, making them ideal for larger backyards or deck areas. When layering sails, ensure that they are properly tensioned and that each anchor point is strong enough to hold multiple sails in place. Using different colors and angles can further elevate the design, making your shaded area a stunning focal point.
Choosing the right location
Choosing the right location is essential for effective shading.
Step 1: determine the sun's position throughout the day and evaluate the shade coverage required.
Step 2: make sure the installation area is free from obstructions like weak trees, power lines, or unstable structures that could interfere with the anchor points.
Step 3: ensure there is enough open space for proper tensioning and that the mounting hardware can withstand wind and weather exposure.
Measuring and determining attachment points
First, let's remember that each corner of the sail must connect to a secure anchor. This means triangle sail requires three anchor points, while a rectangle or square sail needs four.
Measuring and determining attachment points correctly is key to a stable setup.
Use a measuring tape to mark the ideal position, leaving from 14 inches to 3 feet between the sail’s corner and the anchor point for tension adjustments.
Make sure all connections are strong and capable of supporting the sail under different weather conditions.
Taking time to check and reinforce weak points prevents sagging and ensures long-term performance.

4. Tools and materials needed
Essential tools

For a successful installation, gather essential tools like :
- a level
- measuring tape
- turnbuckles: ideally, attach at least 2 of the sail's fixing points to a turnbuckle to create enough tension. The other corners can be attached using snap hooks, S hooks or D shackles.
- joiners: for the remaining corners not attached to turnbuckles. Either S hooks (for small sails), snap hooks (small to medium sails) or D shackles (works with all sizes of sails). Some people use rope tied with a solid knot, but we don't recommend it as it's not going to be as resistant as proper stainless steel hardware.
Additional tools for wall mounting

- Pad eyes: one per anchor point to create on wall. If you're going to attach 2 corners of the shade to the wall, you'll need 2 pad eyes
- A drill (to drill holes for pad eyes)
- An electric screw driver (to fix pad eyes to the wall)
Additional tools for mounting on posts

- steel posts (or treated wooden beams for durability)
- a post hole digger or auger: to help create stable foundations
- concrete mix: to provide the necessary strength
- eye bolts: to create an anchor point on the post which you'll use to connect the sail's fixing points
5. How to install your shade sail
Step 1: Installing attachment points
Fixing to a wall
If attaching the sail to a wall, start by identifying solid mounting points such as brick or reinforced beams. Drill holes using a masonry bit, ensuring the diameter matches the eye bolts or expansion bolts. Attach the pad eyes with stainless steel bolts, securing them tightly so they can handle the tension of the sail. If using a fascia board, reinforce it with additional brackets or a support beam.
Installing support posts
If your sail requires posts, begin by marking where each post should go, ensuring they align with the sail’s intended layout. Dig a hole at least 3 feet deep and 12 inches in diameter, then insert the post and check its level before pouring concrete mix. Let the concrete cure for a minimum of 24 hours to provide a strong foundation. Use reinforced steel posts or treated wood to ensure durability against wind and weather.
Using existing structures
When securing the sail to existing structures like fences, pergolas, or sturdy trees, ensure they can withstand the force applied. If attaching to a tree, use a rope or wire rope with tensioning accessories to allow for some movement and reduce stress on the tree itself. For a fence, reinforce the area with additional brackets or wooden beams.
Step 2: Attaching and tensioning the shade sail
Connecting the sail to anchor points


To properly install the sail, first connect it to the fixing accessories at each corner. Use turnbuckles to gradually tighten the sail and create even tension. If you have multiple sails overlapping, start with the highest sail and work downward, ensuring proper alignment.
Ensuring proper tensioning
A well-tensioned sail will prevent sagging and withstand wind. The sail should be tightened enough to prevent excessive movement but not so much that it places unnecessary strain on the mounting hardware. Regularly check and adjust the turnbuckles to maintain even tension over time.
Step 3: Adjusting for weather conditions
Preparing for rain and wind
A slight incline will allow water runoff and prevent sagging due to rain accumulation. If strong wind conditions arise, loosen the sail slightly to minimize stress on the mounting hardware. During extreme weather conditions or winter months, it is advisable to take down the sail to extend its lifespan and prevent unnecessary wear.
Seasonal adjustments
Depending on the climate, you may need to adjust the tension of the sail throughout the year. In hot months, ensure it provides maximum shade, while in cooler months, you may want to adjust its angle to allow more sunlight.
6. Additional installation tips and maintenance
Avoiding common mistakes
Common mistakes include failing to secure anchor points properly, over-tightening the sail, which can strain the fabric, and using low-quality hardware that may not withstand the elements. Ensuring that your mounting hardware is of high quality and properly installed will help prevent these issues.
Enhancing your shaded area
To make the most of your shade sail area, consider adding LED string lights for a more inviting ambiance. Layering multiple sails creates a unique canopy, while a fascia board provides additional support.
Maintaining your shade sail
Regular maintenance will extend the lifespan of your shade sail. Clean the fabric periodically with mild soap and water to remove dirt and debris. Inspect all mounting hardware and connections to ensure they remain secure. During extreme weather conditions, it’s best to take down the sail and store it properly to avoid damage.
Final thoughts
With proper installation, a shade sail transforms your outdoor space into a stylish, comfortable, and affordable retreat. Whether installed on a deck, patio, or garden, it offers privacy and sun protection. Following this guide, using the right tools, and preparing carefully will ensure a successful and long-lasting DIY project. Get started today and enjoy the benefits of a well-installed shade sail!
Adding product to your cart
- Built to last: withstands wind and humidity
- Cool and shaded: blocks 80% of sunlight
- Military-style S-cut design
- Made from premium 100% polyester
- Hassle-free setup: 40 cm loop fastenings on all four corners
- 1 x camo netting of chosen dimension
White camo netting – stylish, versatile, and built to last
Looking for a unique way to enhance your outdoor space? Our white camo netting is more than just a functional shade—it’s a modern and stylish accessory that transforms any setting. Whether you're creating a chic, shaded retreat on your terrace, adding a trendy decorative touch indoors, or setting up privacy protection for an event, this netting is the perfect solution. Lightweight yet durable, it provides excellent sun protection while maintaining an airy, elegant look.
A modern decorative touch
Unlike traditional camouflage netting, the crisp white design adds a bright, contemporary feel to any space. Use it indoors as a curtain or window covering to diffuse light while maintaining privacy, or outdoors to create a stylish canopy over a pergola, terrace, or balcony. Its sleek, minimalistic appearance also makes it a popular choice for event decor, from garden parties to weddings.
Reliable UV and heat protection
This reinforced camo net offers 70-80% shade, making it an excellent choice for blocking harsh sunlight while still allowing a gentle breeze to pass through. Thanks to its UV-resistant fabric, it maintains its bright white color over time without fading. Plus, its heat-reflecting properties keep your space cooler, making it ideal for sunny outdoor setups.
Durable and weather-resistant
Built for both aesthetics and endurance, this camo net is made from tear-resistant polyester, ensuring it withstands various weather conditions, including strong winds. Whether you're setting it up for a long-term shade solution in your backyard or using it for temporary shelter at an outdoor event, this netting is designed to last.
Easy to install and adapt
Installation is hassle-free—secure it with zip ties, ropes, or built-in attachment loops for a snug fit. Its lightweight yet sturdy construction makes it versatile for a range of uses, from creating shade at a campsite to acting as a privacy screen for a patio or event booth. For a dramatic effect, pair it with lighting for a stunning ambiance at night.
Perfect for creative and professional use
More than just a shade solution, white camo netting is also a go-to accessory for photographers, filmmakers, and event planners. Use it as a backdrop for photoshoots, an eye-catching festival tent cover, or even as part of a themed paintball or laser tag setup. Its neutral yet striking color makes it adaptable for countless applications.
Whether you're seeking shade, privacy, or a stylish decorative element, this reinforced white camo net is a practical and aesthetic choice that fits seamlessly into any environment.
Looking for a different color?
We have additional 7 more colors available in our Camo Netting collection.
- Free tracked shipping: Enjoy fast, free delivery with tracking to monitor your order from dispatch to arrival.
- Easy returns: If you're not satisfied, return your item within 14 days for a full refund.
Often purchased with
from $8.90
- Unit price
- / per
In stock
$35.90
- Unit price
- / per
In stock
from $24.90
- Unit price
- / per
In stock
Styled with our products
FAQ
No, camo netting is not waterproof—it’s made of open mesh, so rain passes right through. But don’t worry, it won’t get damaged by rain or humidity. It’s designed to handle outdoor conditions without falling apart.
Yes, it’s great for dappled shade. It won’t block the sun completely, but it softens the light and reduces glare, which helps keep areas cooler and more comfortable. Perfect for gardens, patios, or over seating areas.
Definitely. Our camo nets are made with durable, UV-resistant materials that can stand up to sun, wind, and rain. For longer-term use, choose versions with reinforced edges or added mesh backing for extra strength.
Super easy. You can tie it to trees, fences, posts, pergolas—anything sturdy. Use zip ties, rope, or bungee cords. Some nets come with built-in loops or cords to make setup even faster. Check out our installation guide for step-by-step help.
Camo netting is incredibly versatile. Use it for garden shade, privacy screens, camping, event decor, covering gear, hiding bins—pretty much anywhere you want coverage with a rugged, natural look.